Quickstart
Manually connect your application, send a first test, and verify delivery.
Updated
You can set up Sendpository yourself: no CLI, coding agent, or support call is required. You need access to your account inbox and a server-side application or terminal. You only need DNS access when sending from your own domain.
The fastest way: one command
Run npx sendpository@latest init in your project. It opens your browser to
approve (or sign up), then saves the API key to your env file, keeps it out of
git, installs the SDK and the AI coding agent skill,
and sends you a test email where your account allows. This is optional; the
manual steps below work without it.
1. Create an account
Sign up at /signup. You land on Get started. Open the confirmation email and click its link, then return to Get started. If it did not arrive, check spam and use Resend in the dashboard banner. You can explore and create a key before confirming, but you cannot send yet. Google accounts with a verified Google-hosted mailbox do not need this extra step.
2. Verify your sending domain
Email providers only trust mail from a domain that has vouched for the sender. That's what verification does.
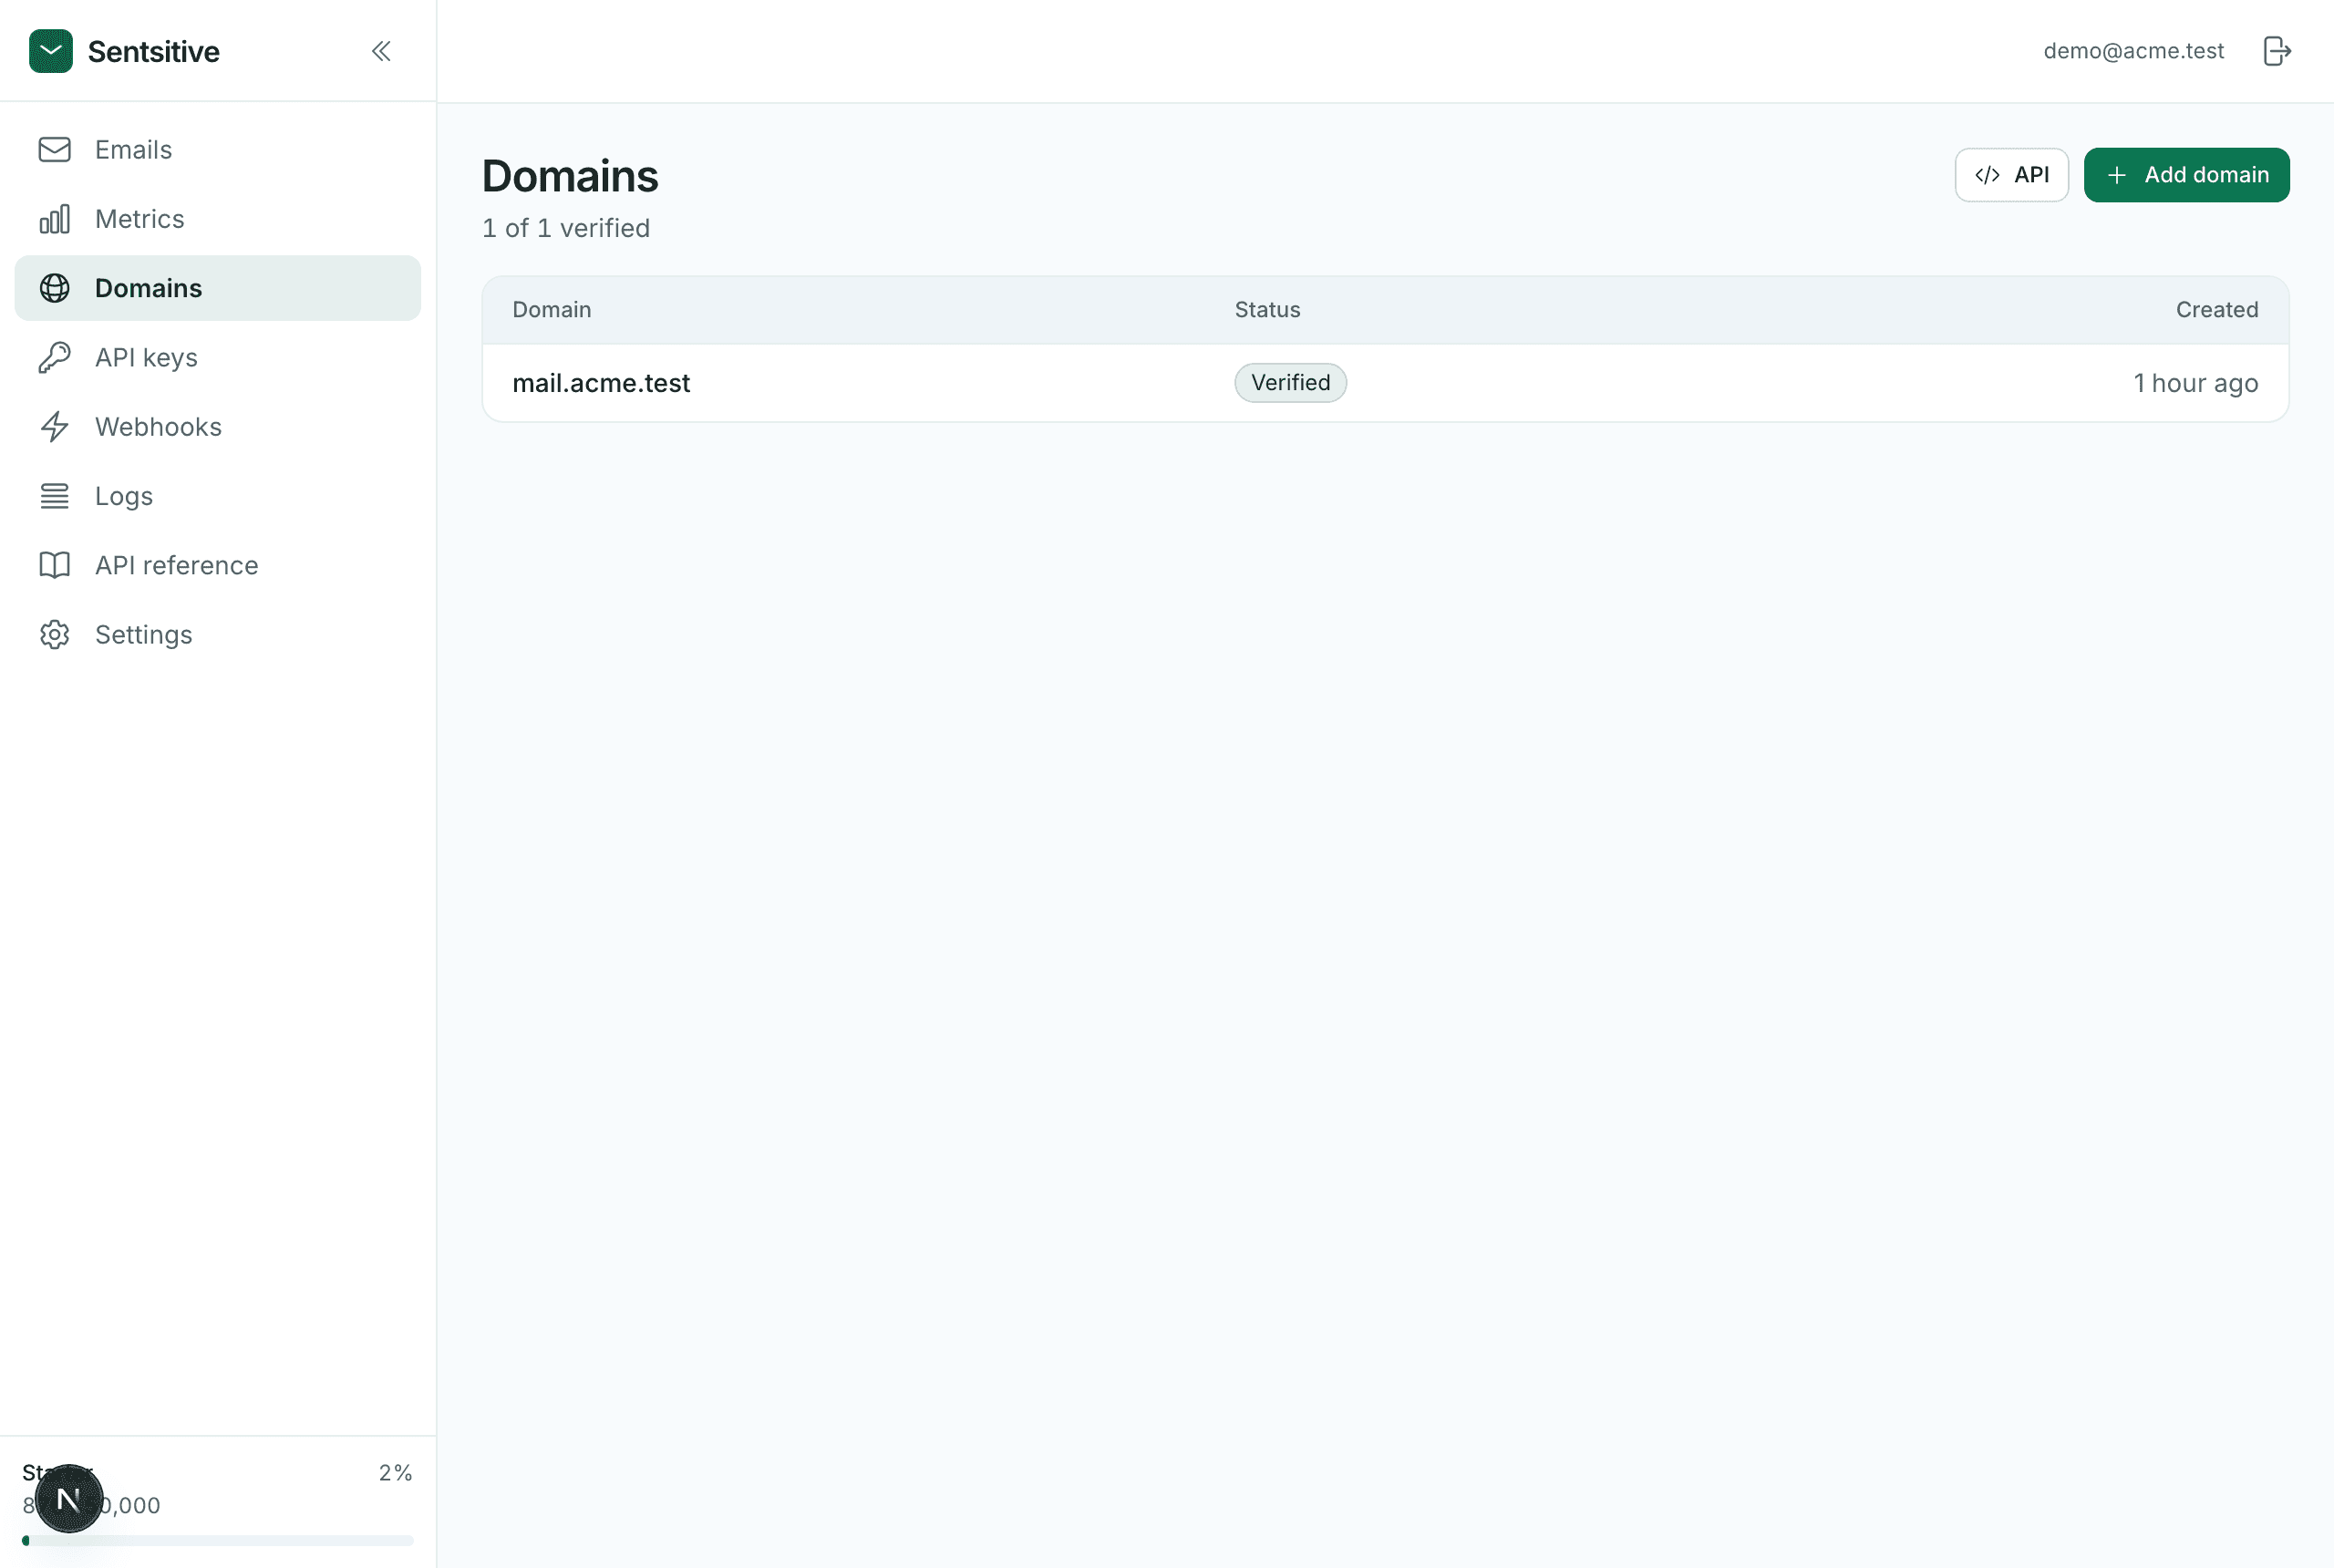
Go to Domains → Add domain and enter a subdomain you control, for example
mail.yourdomain.com.
Why a subdomain?
Sending from a subdomain keeps your main domain's reputation separate. If
something goes wrong with your sending, yourdomain.com email - the mail your
staff send by hand - isn't affected.
You'll be shown four DNS records:
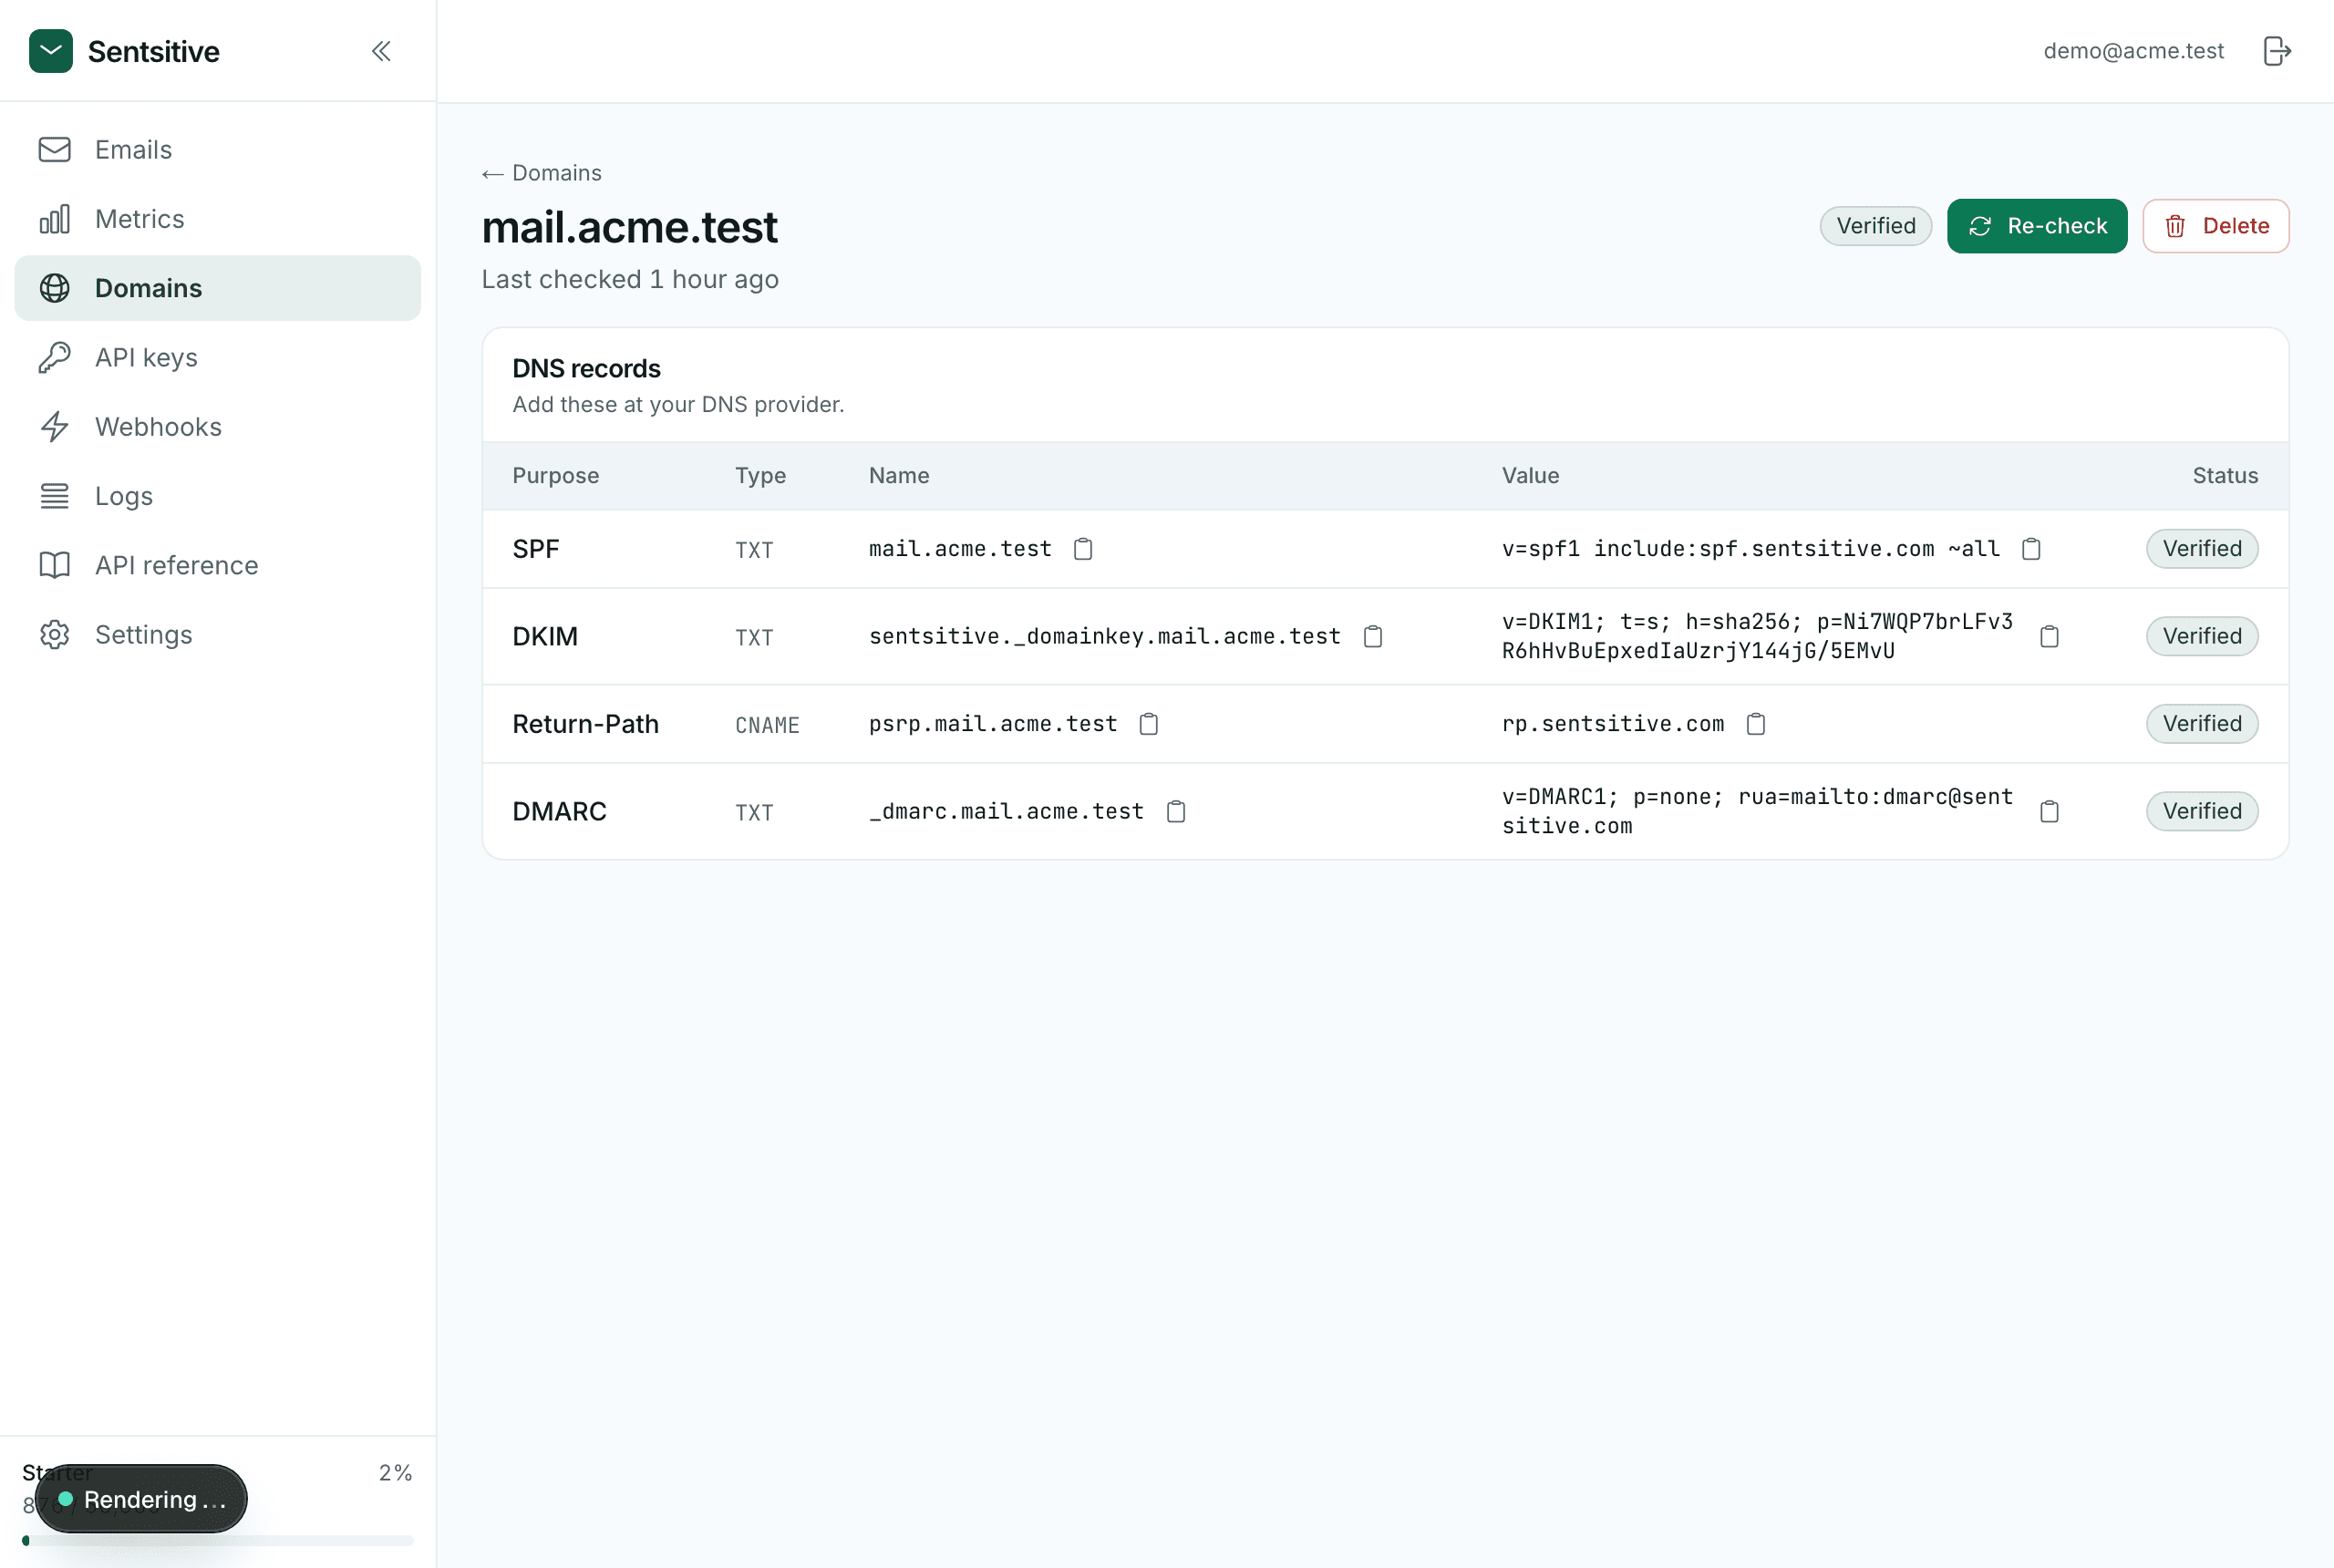
Publish the displayed records at your DNS provider (Cloudflare, Route 53, GoDaddy, or wherever your DNS is hosted), then press Verify. Copy the account-specific values; do not copy an example DKIM key from documentation.
Testing before DNS is ready
If Get started shows a sandbox From address, you can send with it while verification is pending - only to your own confirmed account email, up to 20 messages per UTC day, and it cannot schedule messages. If no sandbox address is shown, verify your domain before sending.
The Send dashboard test button checks the account's sending path, not your application's code. Run the example in step 4 to test your application too.
Do not replace existing apex MX/SPF records. If DMARC already exists, leave it in place rather than adding a second record.
| Record | What it does |
|---|---|
| SPF | Says which servers may send mail for your domain. |
| DKIM | Publishes a public key so recipients can check the signature we add to every message. |
| Return-Path | Where bounces come back to, so we can process them. |
| DMARC | Tells providers what to do if a message fails the checks above. |
DNS is not instant
Records can take a few minutes to propagate - sometimes longer. If verification says Pending, wait and press Verify again. Nothing is wrong.
Once SPF, DKIM, and the Return-Path MX resolve, the domain flips to Verified and you can send. DMARC is recommended, not a verification blocker. See DNS troubleshooting if it stays pending.
3. Create an API key
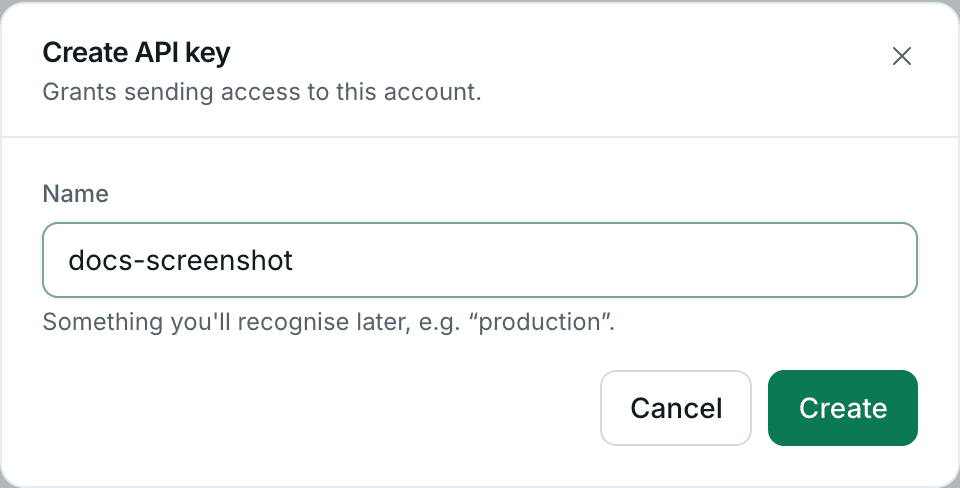
Use Create an API key on Get started, or go to API keys → Create API key
and give it a name like development. Use a sending-only key for your app.
The key lasts as long as the tab
It is copied to your clipboard on creation and stays on the API keys page until you close that browser tab. We store only a hash, so after that it can't be recovered - you create a new one and revoke the old. Put it in an environment variable, never in your source code.
SENDPOSITORY_API_KEY=sp_your_api_keyAdd .env to .gitignore before saving the key. On your hosting platform,
add it to server-side secret/environment settings and restart or redeploy.
Never use a NEXT_PUBLIC_ or VITE_ prefix or place the key in browser/mobile
code. Your frontend calls your backend; your backend calls Sendpository.
A .env file is not automatically loaded by a shell or most language runtimes.
For the terminal examples below, load the key without saving it in shell history:
printf 'Paste your API key (hidden): '
IFS= read -r -s SENDPOSITORY_API_KEY
printf '\n'
export SENDPOSITORY_API_KEY
On Windows, use a Bash terminal such as WSL/Git Bash for this command, or your application framework's server-side environment configuration.
4. Send your first email
Replace From with an address on your exact verified domain (or the sandbox
address, if Get started shows one). Replace To with your own inbox for this test.
The public API base is https://api.sendpository.com/v1; self-hosted/staging
deployments should use the API base displayed on their Get started page.
curl --fail-with-body --max-time 15 -X POST https://api.sendpository.com/v1/emails \
  -H "Authorization: Bearer $SENDPOSITORY_API_KEY" \
  -H "Content-Type: application/json" \
  -d '{
    "from": "Acme <hello@mail.yourdomain.com>",
    "to": ["you@example.com"],
    "subject": "My first email",
    "html": "<p>It works.</p>"
  }'
A success looks like this:
{ "id": "d67e39ed-96be-4b35-ab22-853163d92c92" }That id means the message was accepted, not that it reached an inbox. Store
it to find the message under Emails and inspect its delivery timeline.
From your application
Install the client:
npm install sendpositorySave the following as send.mjs. With Node.js 20+, run
node --env-file=.env send.mjs. If you exported the key in your shell instead,
run node send.mjs.
import { Sendpository } from "sendpository";

if (!process.env.SENDPOSITORY_API_KEY) throw new Error("Set SENDPOSITORY_API_KEY first.");
const sendpository = new Sendpository(process.env.SENDPOSITORY_API_KEY);

const { id } = await sendpository.emails.send({
  from: "Acme <hello@mail.yourdomain.com>",
  to: ["you@example.com"],
  subject: "My first email",
  html: "<p>It works.</p>",
});

console.log(id);
The client adds typed errors, retries on rate limits and 5xx responses, and webhook signature verification. It has no dependencies of its own.
Prefer no dependencies?
The API is plain JSON over HTTPS, so fetch works just as well:
const res = await fetch("https://api.sendpository.com/v1/emails", {
  method: "POST",
  headers: {
    Authorization: `Bearer ${process.env.SENDPOSITORY_API_KEY}`,
    "Content-Type": "application/json",
  },
  body: JSON.stringify({
    from: "Acme <hello@mail.yourdomain.com>",
    to: ["you@example.com"],
    subject: "My first email",
    html: "<p>It works.</p>",
  }),
});

const data = await res.json();
if (!res.ok) throw new Error(`${data.error.type}: ${data.error.message}`);

console.log(data.id);
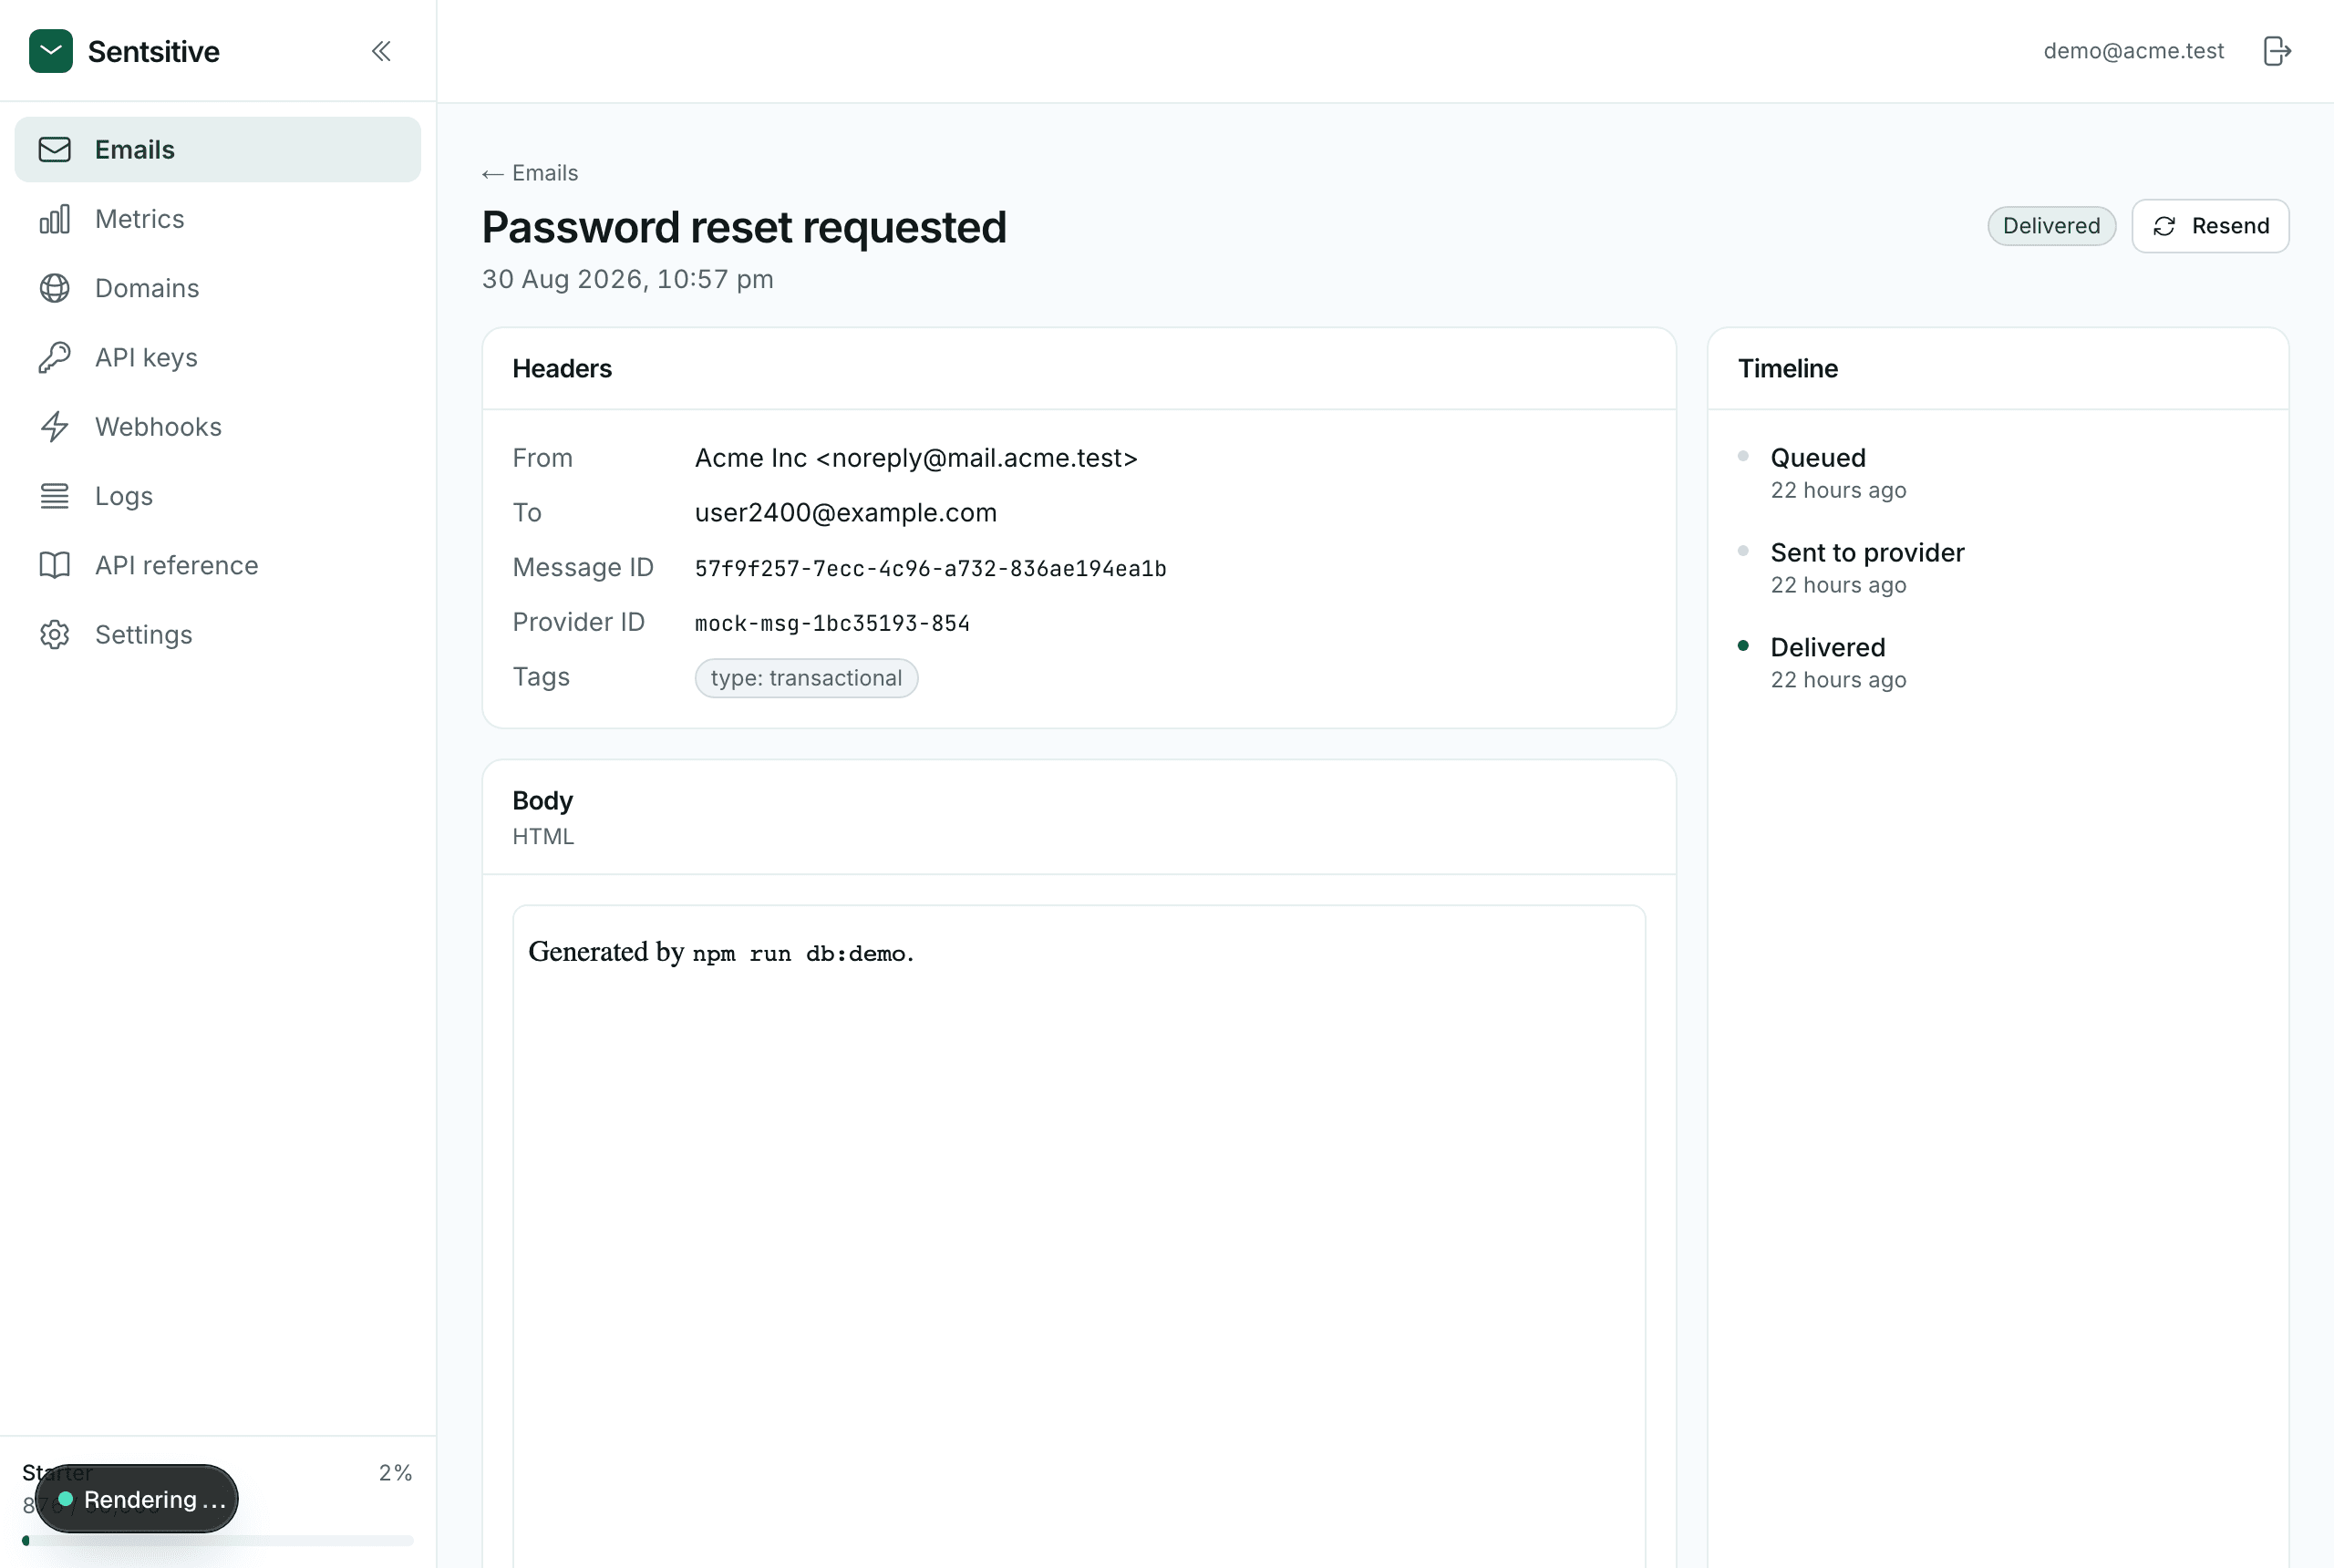
5. See what happened
Every message appears in Emails, with its current status.
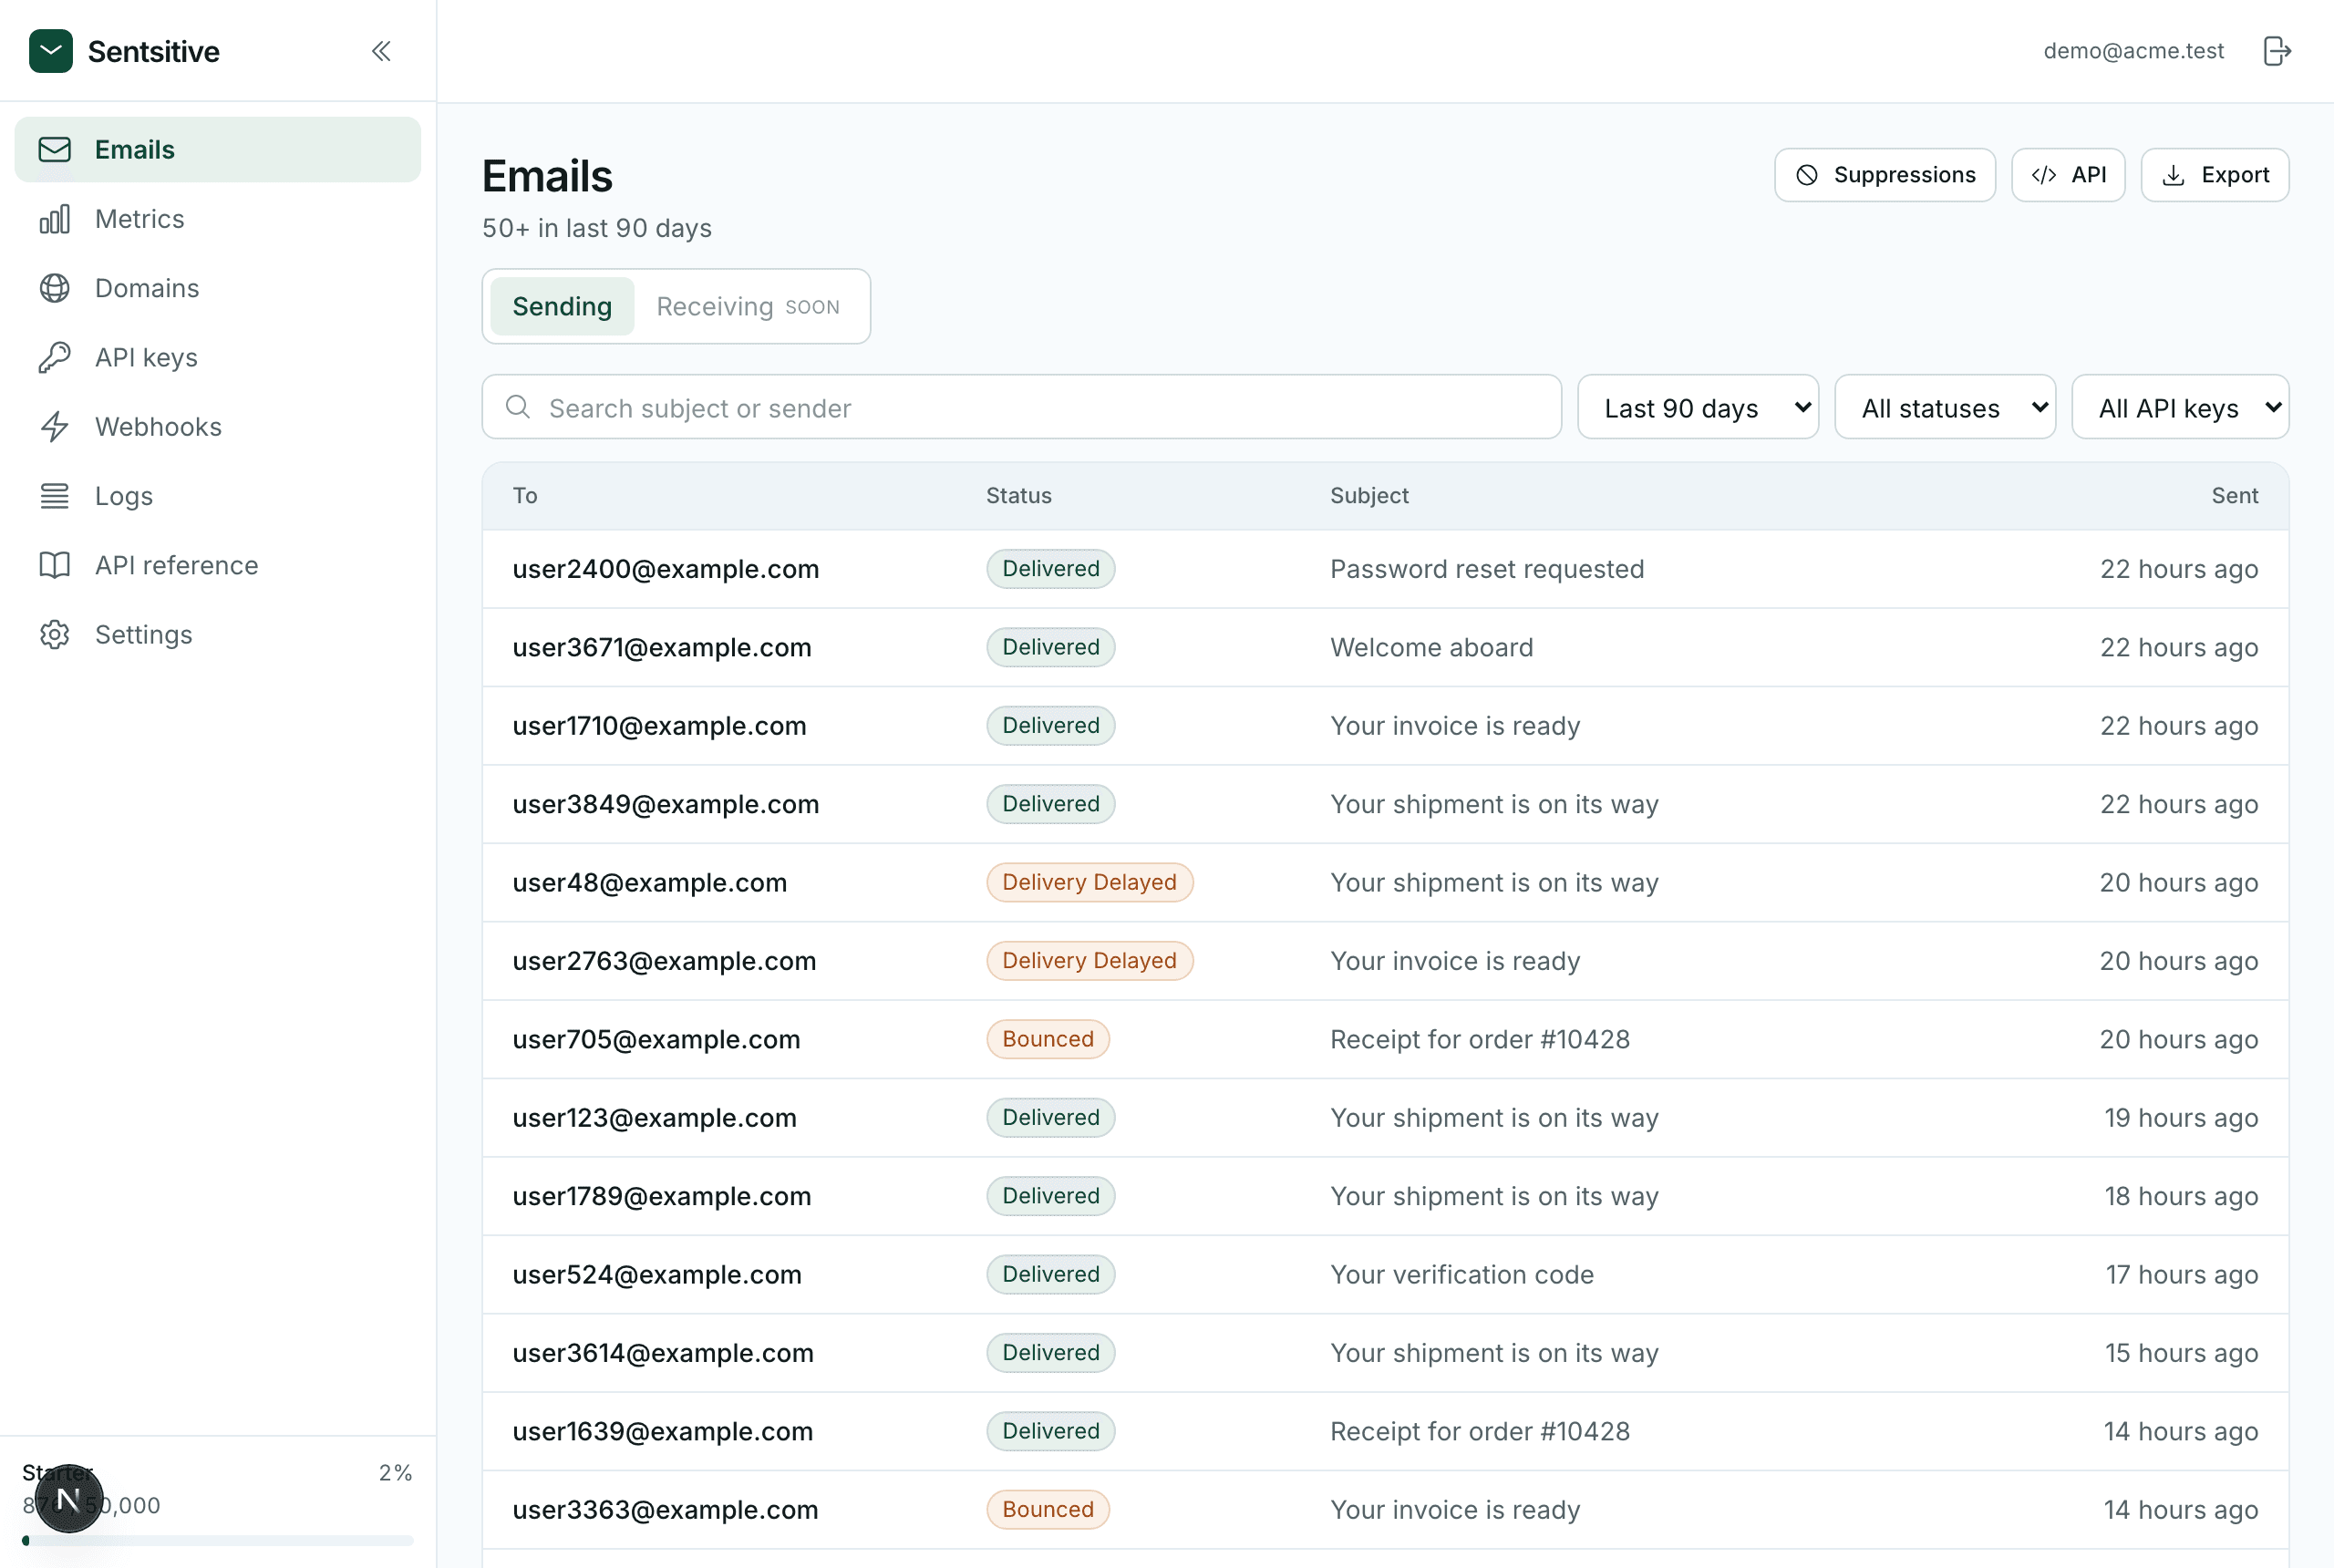
Open one to see its full timeline - queued, sent, delivered, opened, and any bounce detail:
If it didn't work
Check the error type in the JSON response before changing your setup.
authentication_error
Check that the full key is loaded in the same process running the example.
A key prefix ending in ... is a dashboard label, not a working credential.
Never post your key in a support message.
rate_limit_exceeded
Wait for the seconds in the Retry-After header. Running every language example
in quick succession can use the plan's short burst allowance. On retries,
reuse an idempotency key for the same logical message.
domain_not_verified
The domain in your from address is not verified on your account. The from
domain must match a domain in Domains exactly - hello@yourdomain.com
will not send on a domain verified as mail.yourdomain.com. They are
different domains as far as DNS is concerned.
email_not_verified
Your own account address has not been confirmed. Check your inbox for the confirmation email from signup, or resend it from the banner on the dashboard. You can explore everything without confirming, but you cannot send.
It says Sent but nothing arrived
Open the message in Emails and read its timeline. Three common causes:
- It went to spam. New sending domains have no reputation yet. Check the spam folder, and recheck domain authentication.
- It bounced. The timeline shows the receiving server's reason verbatim. A hard bounce also adds the address to your suppression list, so a second send to it is refused on purpose.
- The recipient domain rejected it silently. Rare, and the timeline will
show
deliveredwith nothing after it.
Check the message headers
In Gmail, open the message and choose Show original. SPF, DKIM and
DMARC should all read PASS. If DKIM fails, the DKIM record has not
propagated yet or was pasted incorrectly - a partial key fails silently.
What next
Before production, verify your own domain, use a separate production key, handle typed errors and idempotent retries, and verify webhook signatures. Monitor your daily/monthly allowance under Settings → Plan. No dashboard send button installs code in your project: keep the send call in an authenticated server-side handler.